Yoga is one of the oldest workout routines that offers mental and physical benefits. However, if you practice a particular practice long enough, its benefits start to plateau, and it also causes boredom. Fortunately, there are hundreds of yoga poses, so boredom is an issue you can tick off, but you do need adequate leg strength and balance to achieve them.
These yoga poses for legs will help build leg strength and improve balance, enabling you to practice more advanced and complex poses. This article will explain these poses in detail. Let’s get to it.
Explanation Of The Importance of Yoga For Leg Strength and Flexibility
Many Yoga poses put the whole body weight on the legs, and one cannot pull them off unless the legs have adequate strength and balance. Building solid legs improves flexibility, enabling you to achieve those poses quickly. Furthermore, it also increases the body’s resilience against stress, manifested in several ways, including solid balance, mobile joints, and strong and flexible muscles.
More importantly, strong legs will allow you to hold the poses longer and prolong yoga sessions, offering even more physical and mental benefits.
Overview of The Poses To Be Covered In The Post
Looking at the anatomy of the legs will let you know five major muscle groups, including hamstrings, adductors, shins, quadriceps, and calves. Not many exercises target these muscles equally, which warrants the undertaking of different poses to build them together.
It is essential to build all these muscles to improve leg strength and balance. Yoga poses targeting these muscles can be divided based on the shape one makes while practicing them. Let’s take a look at them.
Standing Poses
1. Tadasana (Mountain Pose)

Tadasana, also known as Mountain pose, is suitable for established and beginners yogis alike. Almost all standing poses start from tadasana, which means perfecting it will also help you with other workouts. You have to start standing while keeping the feet about half a foot apart.
Follow it by pulling the kneecaps and squeezing the thighs such that tailbone gets tucked under. Ensure that knees are not locked, and legs are straight. The spine should also be straight, and breathing should be ensured by putting pressure on the waist.
2. Uthiita Trikonasana (Extended Triangle Pose)
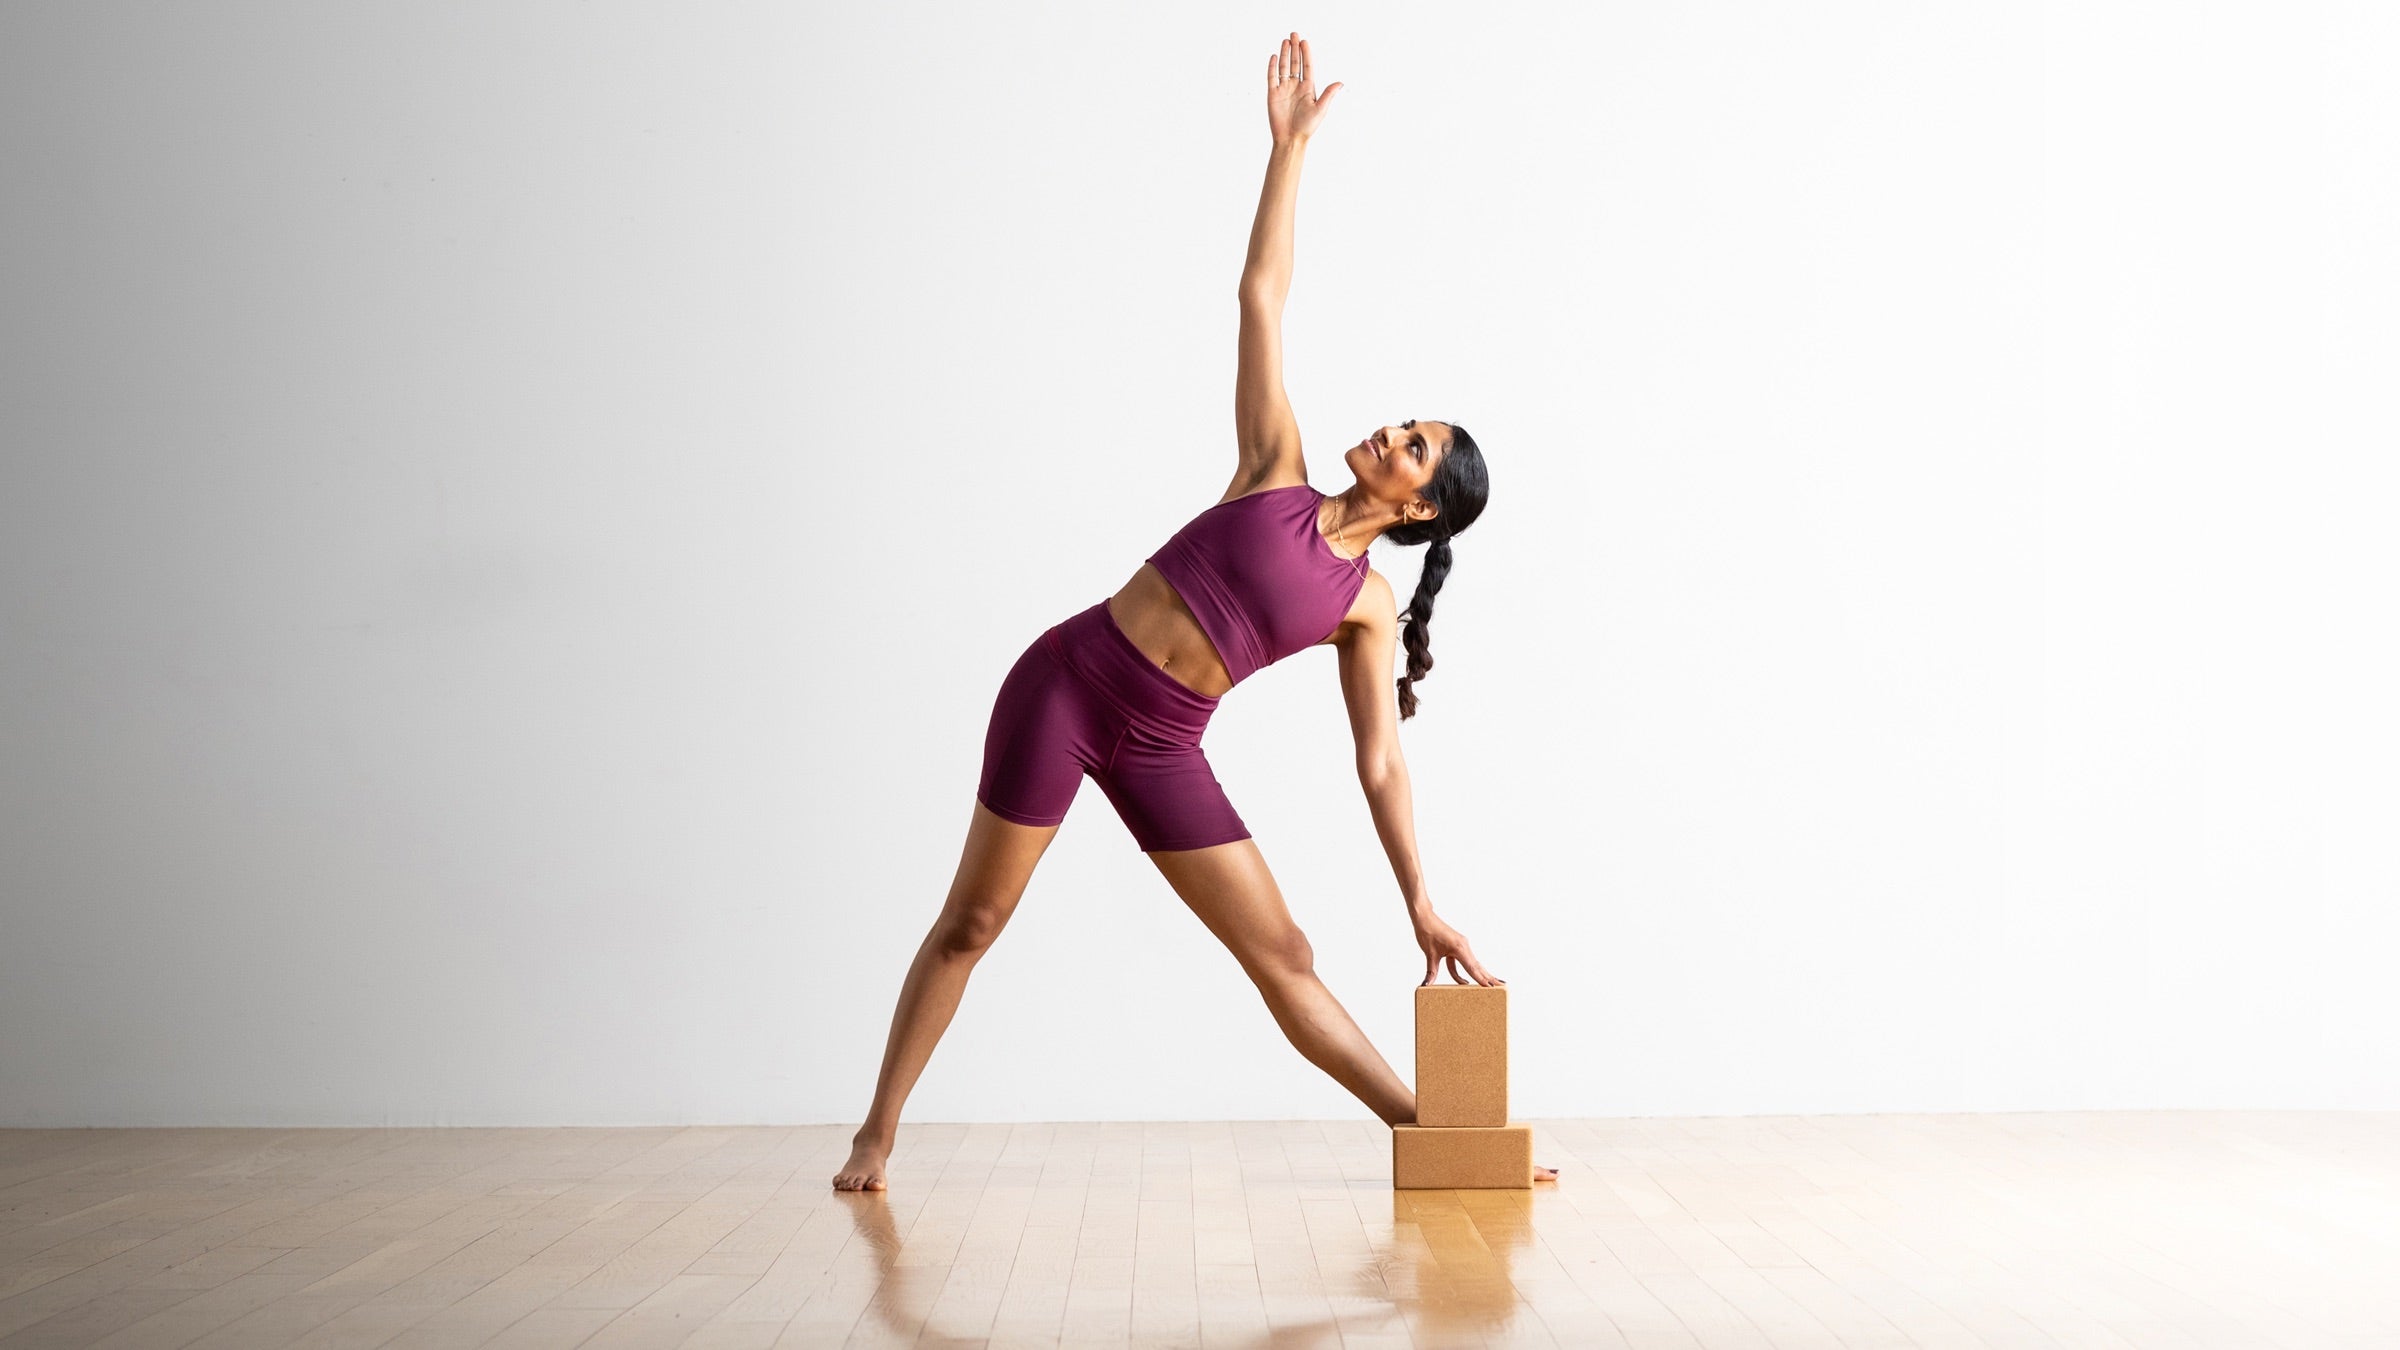
The extended Triangle Pose targets four groups of muscles, including the chest, groin, hips, and hamstrings. It is beginner friendly workout that starts with engaging thigh muscles keeping the femur in the socket by drawing it forward. Follow it by lowering a hand till it reaches the ankle.
Your shoulders should be stacked on each other while you open the chest. You can pull it off by reaching your fingertips towards the ceiling while one shoulder is locked in its socket. Look towards the left fingertips by turning the head and drawing the right thigh upwards to achieve the pose.
3. Virabhadrasana Li (Warrior Li Pose)
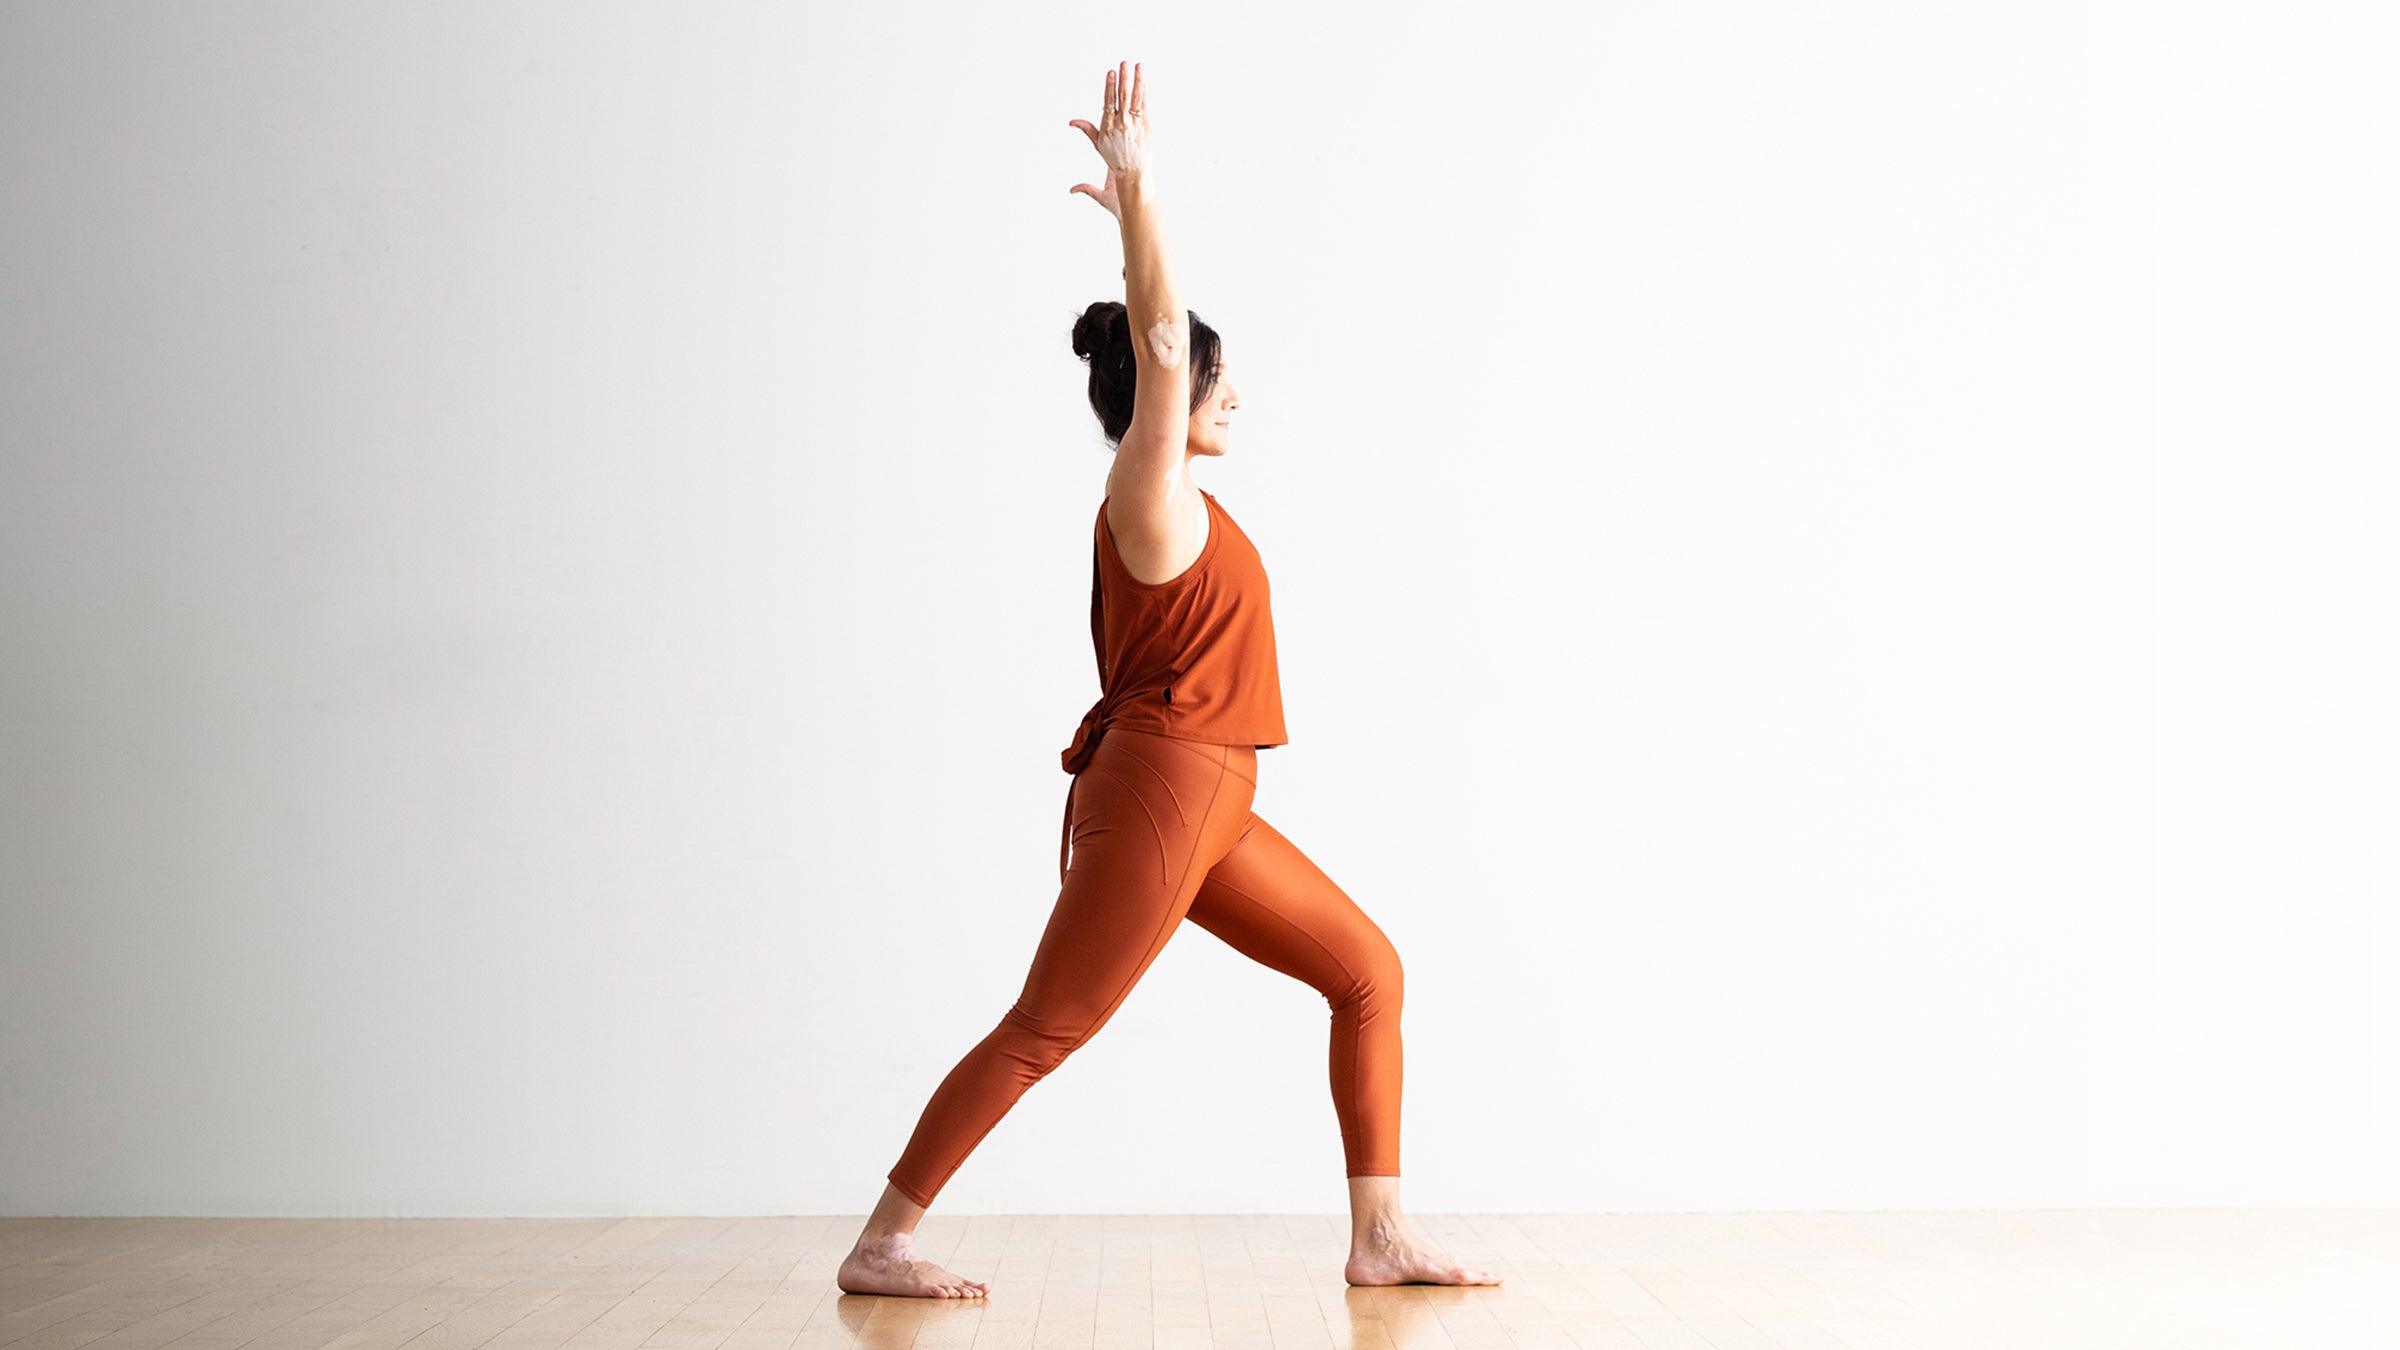
Virabhadrasana Li is also a beginner’s friendly pose that targets diverse muscles, including the core, quadriceps, shoulders, adductors, and lower limbs. You can achieve it by bending the right leg forward and making a 90-degree angle with the knee while keeping the left leg wholly stretched behind.
Then, raise your hands so both palms touch and are completely straight. Your spine should be straight and your chest slightly curved to achieve this pose.
4. Prasartia Padottanasana (Wide-Legged Forward Bend)

Prasartia Padottanasana is a slightly challenging pose, but it targets the lower limbs effectively. You start by keeping the legs apart and wholly stretched. Start to lower the upper portion of your body while keeping the arms bent at an angle of 90 degrees.
Bend down completely such that the head should touch the ground and the hands should touch both feet. Bring the hands closer to the neck to make it slightly easier to achieve the pose.
Seated Poses
1. Baddha Konasana (Bound Angle Pose)

Badda Konasana is also known as a sitting Buddha pose and is friendly for beginners. While it also targets other muscles, the quadriceps are focused more. You start by sitting in Budda Position while keeping the spine straight. Bring your hands down to touch both feet to achieve the pose.
2. Janu Sirsasana (Head-To-Knee Forward Bend)
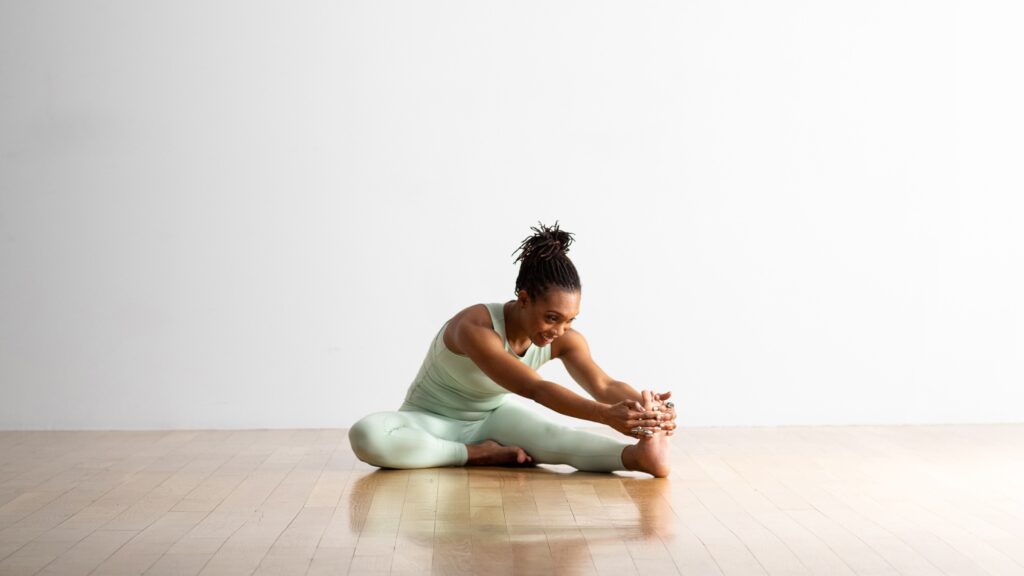
Janu Sirsasana is a slightly tricky pose that targets the spine, hips, core, and lower limb muscles. It has several variations, but the most straightforward posture is sitting on the surface and extending one leg forward.
The other leg should be inwards, touching the knees. Put your hand forward so it is at the same level as the stretched leg. It will lower your neck to achieve the pose.
3. Upavistha Konasana (Wide-Angle Seated Forward Bend)

Upavista Konasana targets adductors and the muscles in the back. It is slightly challenging but not too advanced. You start by sitting on the ground and keeping both hands planted. Start to move your legs apart from each other and go as wide as you can.
The perfect pose is achieved when both legs make almost a straight line. Now move your hands forward and start to bend down while keeping the spine straight. Do not look upwards or sideways to achieve the pose.
4. Goukhasana (Cow Face Pose)

Cow Face Pose targets diverse muscle groups in the body using the bodyweight, including the quadriceps. Start and seated position and cross the legs such that both make the same angle. While there should be a bend, it does not have to be a 90-degree.
Then, raise one arm, bring it to the back, and use the other hand to grab it with your fingers. To perfect the pose, the bent elbow angle should be the same for both arms.
Reclining Poses
1. Supta Padangusthasana (Reclining Hand-To-Big-Toe Pose)

Supta Padangusthasana is the most straightforward reclining pose that targets muscles in the spine and hip region. Start by laying straight on the ground and lifting one leg to make a 90-degree angle with the other. You can bring the legs closer to the neck with flexibility. Touch the fingers of the foot with the arms while keeping it straight in the socket to achieve the pose.
2. Supta Virasana (Reclining Hero Pose)
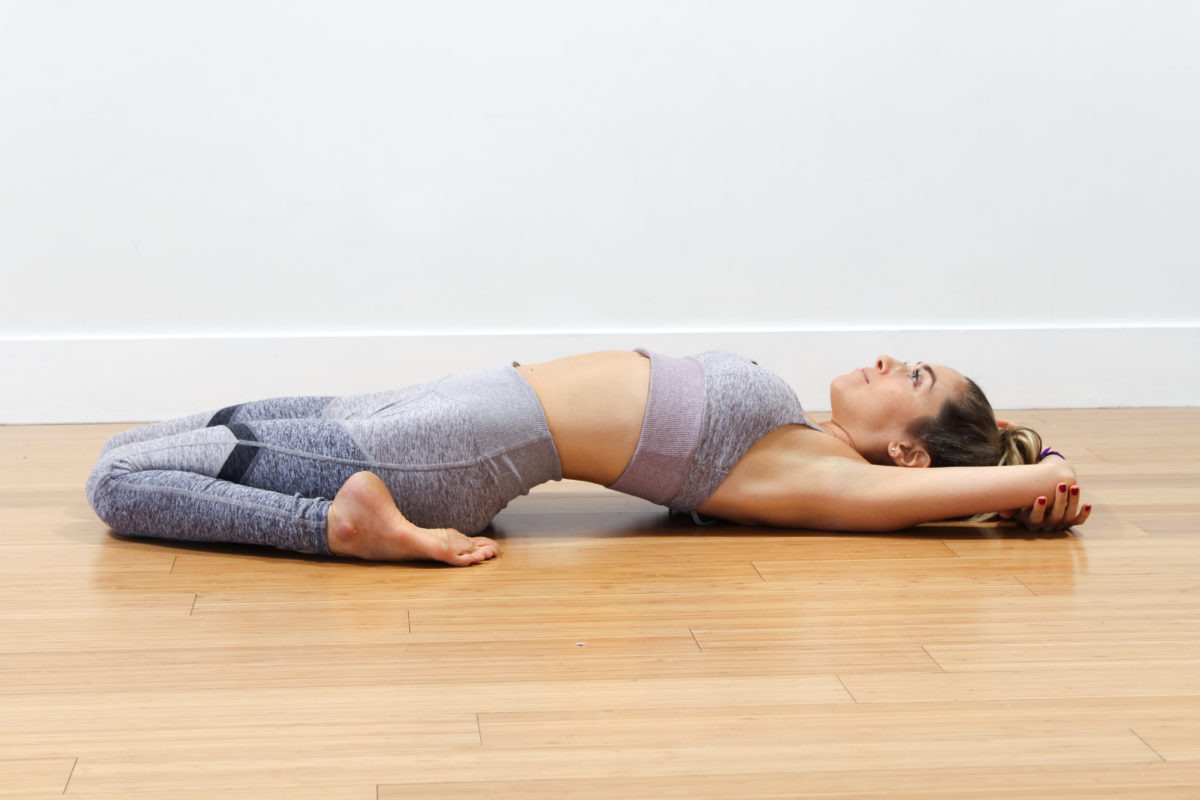
Supta Virasana is an advanced-level workout involving sitting on your knees while fully stretching the lower limbs. While keeping the spine straight, bend backward so your head touches the ground.
Extend the arms and face the palm towards the bottom to achieve the pose. You can also perform the pose without all of the back touching the ground.
3. Setu Bandha Sarvangasana (Bridge Pose)

Setu Bandha Sarvangasana targets the lower limbs and the muscles in the core. Lie down on the ground and bend the knees to make a 90-degree angle with the ground. Start lifting the body using the core’s strength. The body should be raised in a straight line without a curve in it while keeping the neck straight. Bring the hands beneath the body and lock them together to achieve the pose.
4. Supta Baddha Konasana (Reclining Bound Angle Pose)

Sputa Badda Konasana is an easy exercise that starts with you lying down on the ground. Bring your feet together and start pulling them upwards simultaneously. The heels of both feet should touch each other while you pull them upwards. When both legs make a triangle shape, move your hands apart from the body to achieve the pose.
FAQs
Can Yoga Help Me Improve My Flexibility in My Legs?
Several yoga poses target leg muscles and improves their strength and flexibility. You will be able to undertake more challenging yoga poses with such stability.
What Are Some Yoga Poses That Stretch The Legs?
Downward Dog, Balasana, Triangle, Low Lunge, Mountain, and Cat Cow are some poses that stretch the legs.
Can Yoga Help Me Relieve Leg Pain?
Yoga can help relieve leg pain, and it is backed by research. Several asanas in yoga target specific leg muscles and improve their strength to relieve pain.
Can Yoga Help Me Improve My Balance and Stablity in My Legs?
Yoga poses for leg stretch tight muscles and challenges dynamic and static balancing skills. When you practice these poses long enough; it builds strength and flexibility in those muscles.
How Can I Modify Poses If I Have Tight or Injured Legs?
There is no single modification that works for all injuries. You have to understand the point of injury and go through the steps of a particular pose to modify it as per the injury.
Conclusion
Building leg strength and improving flexibility are vital to practicing Yoga. Without them, you cannot practice complex and challenging poses, thus plateauing the benefit of the workout. Not to mention, not upgrading the workout routine also produces boredom that ultimately makes you lose interest in the exercise altogether. There are several yoga poses that target leg muscles – some of them have been mentioned in this piece. Incorporate them into your workout routine and start your journey towards steadier, healthier, and stronger legs.
